In the first part of this series, we explored the basics of disk and partition management via the command-line. Next, we'll see how we can perform disk partitioning as well as how to split, merge and erase ones created.
Real World Usage
Back in my days in Crosshaven Computers, we would use the command-line to create external diagnostic drives that contained multiple volumes. We'd usually need at least 5-10 of these drives at any one time and they all had to be identical, so every month each drive would be reset.
To automate the process and guarantee that each drive created was exactly the same, a shell script would automatically split a drive into the desired number of partitions then restore various versions of OS X and diagnostic software automatically.
This level of automation is simply not possible with Disk Utility, demonstrating how the command-line can be more useful.
Partitioning a Disk
To partition a disk, we use:
diskutil partitionDisk /dev/disk2 GPT JHFS+ New 0b
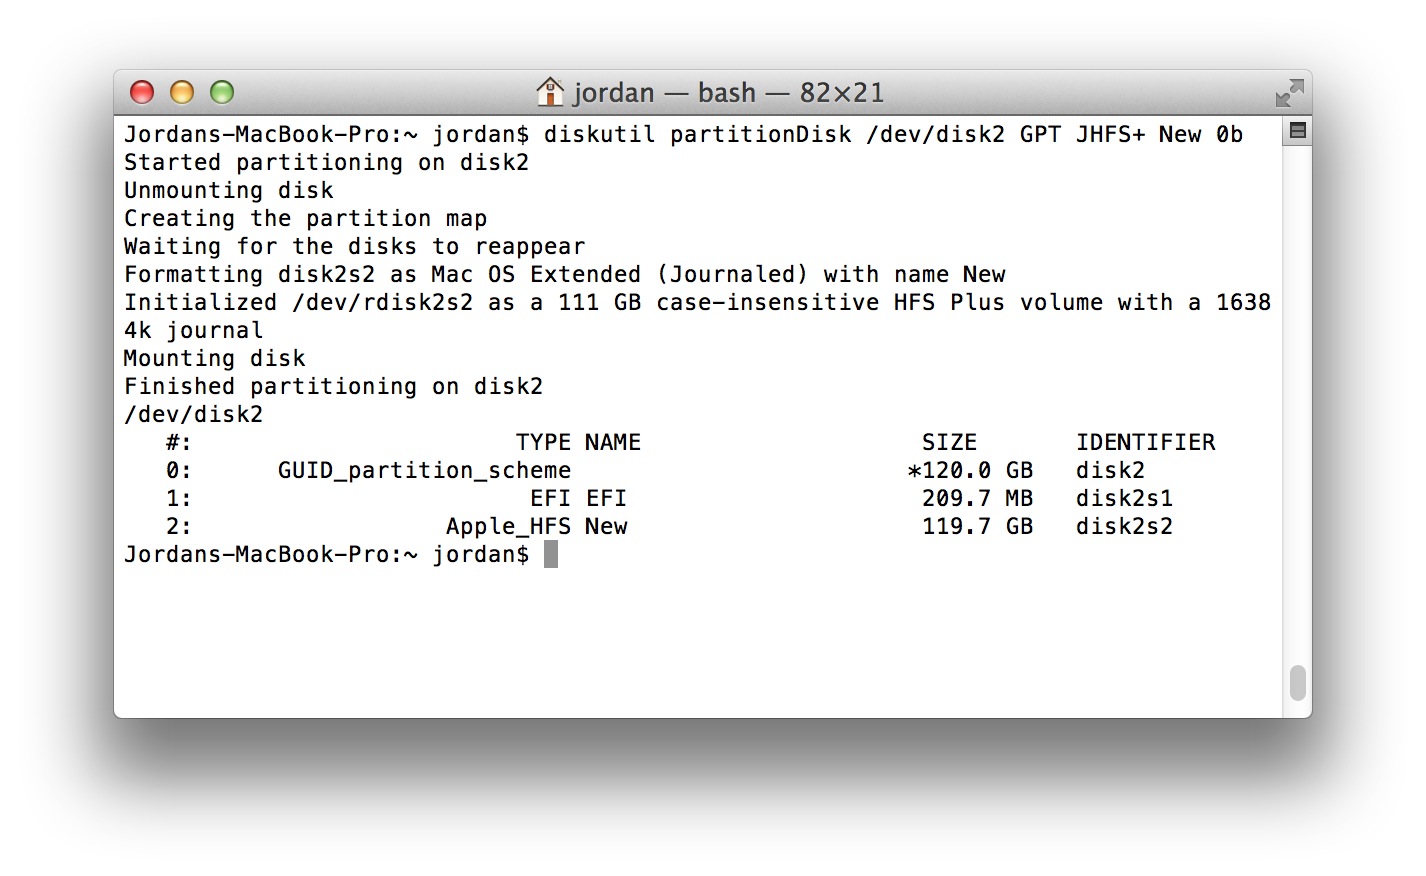
The first three parts of the command are self explanatory, there's the actual diskutil command followed by the option partitionDisk and the disk's identifier /dev/disk(n). You'll also recognise JHFS+ as the filesystem, followed by the label to give the newly-created volume.
Partition Scheme
GPT is an option for the Partition Scheme. There are three you can use:
- GPT: GUID Partition Table
- APM: Apple Partition Map
- MBR: Master Boot Records
Unless you intend to boot a PowerPC-based Mac or Windows PC with your hard disk, there's no reason to select anything other than GPT. Intel Macs can only boot from GUID partitions.
Partition Size
At the end of the command is the argument 0b. This represents the size of the partition to create. You can specify any size you wish, up to the maximum size of the free space available, using b (bytes), m (megabytes), g (gigabytes) and so-on.
Specifying 0b tells the command to just use all available free space.
So the command to run will repartition a hard disk identified as disk2 with GUID Partition Table containing a single volume called New that spans the entire disk.
Multiple Partitioning
Using the same command, we partition a hard disk with multiple partitions and formatting them as useable volumes.
diskutil partitionDisk /dev/disk2 GPT JHFS+ First 10g JHFS+ Second 10g JHFS+ Third 10g JHFS+ Fourth 10g JHFS+ Fifth 0b
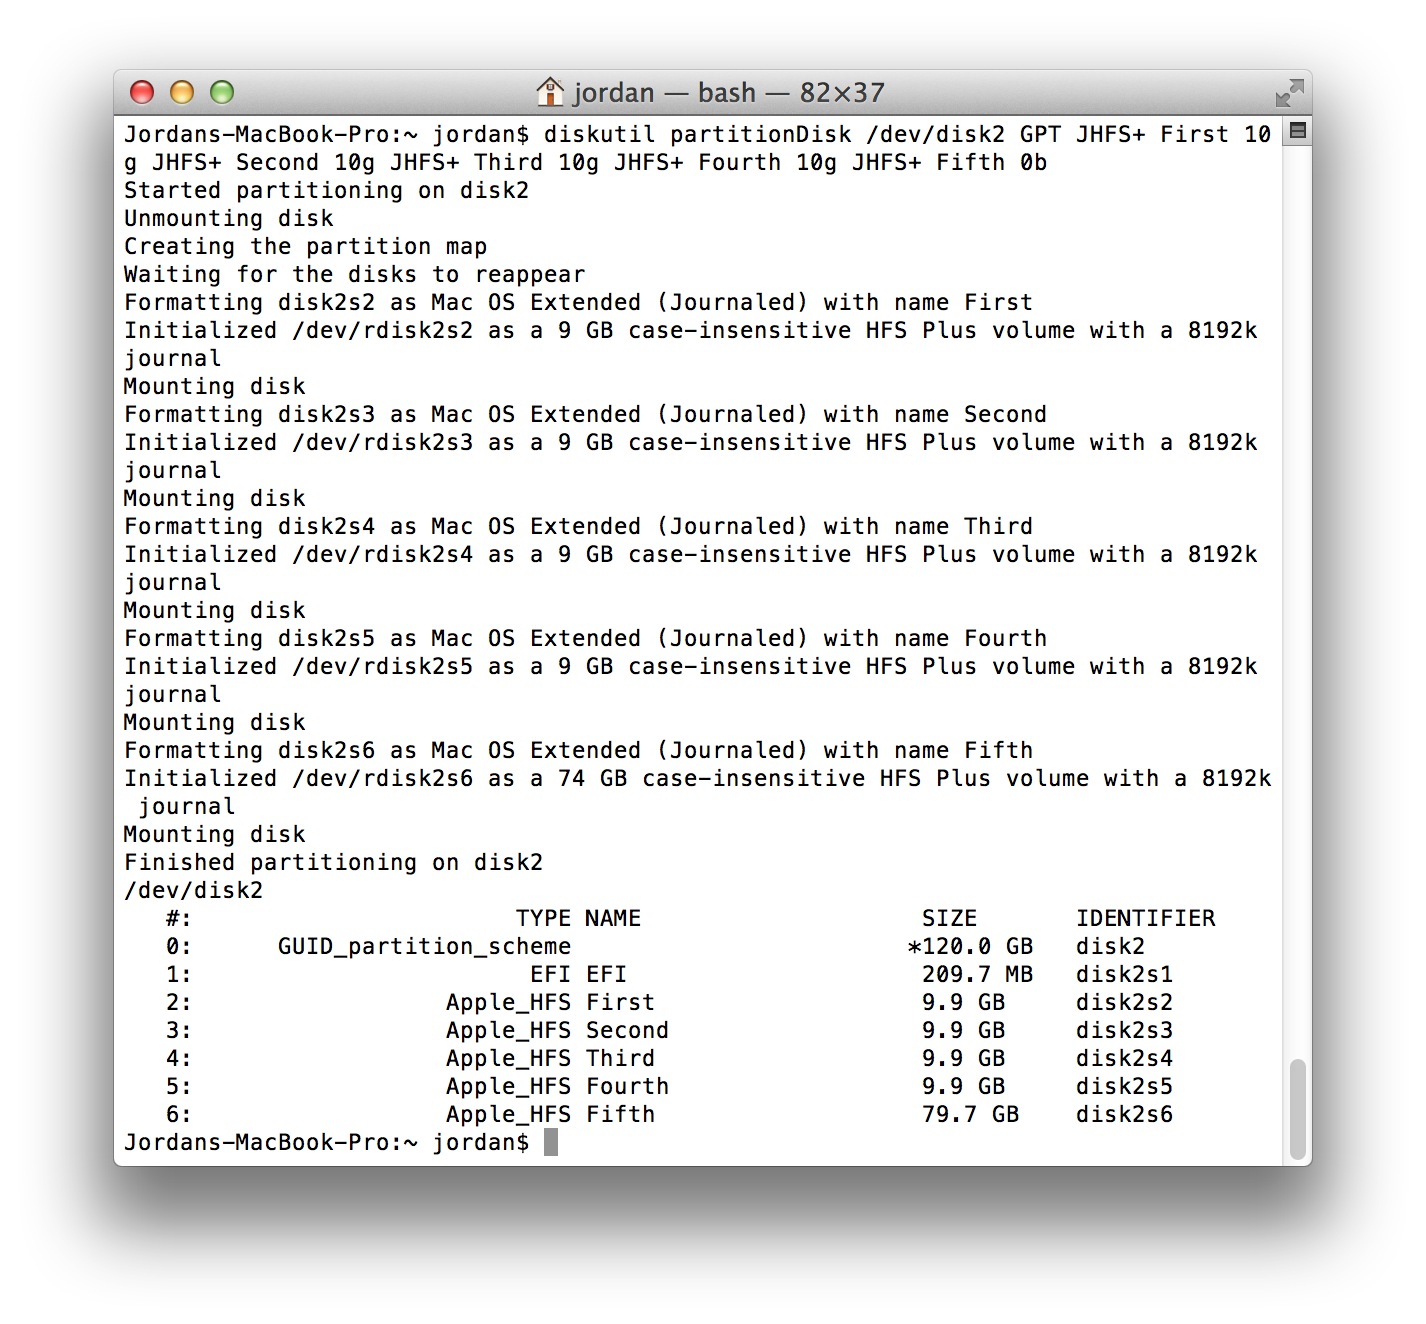
For each additional partition you wish to add, the usage convention is as follows:
Volume1Format Volume1Name Volume1Size Volume2Format Volume2Name Volume2Size Volume3Format Volume3Name Volume3Size...
If the total size of all volumes is less than the space on the hard disk you're wanting to partition, the remaining space will be left as free.
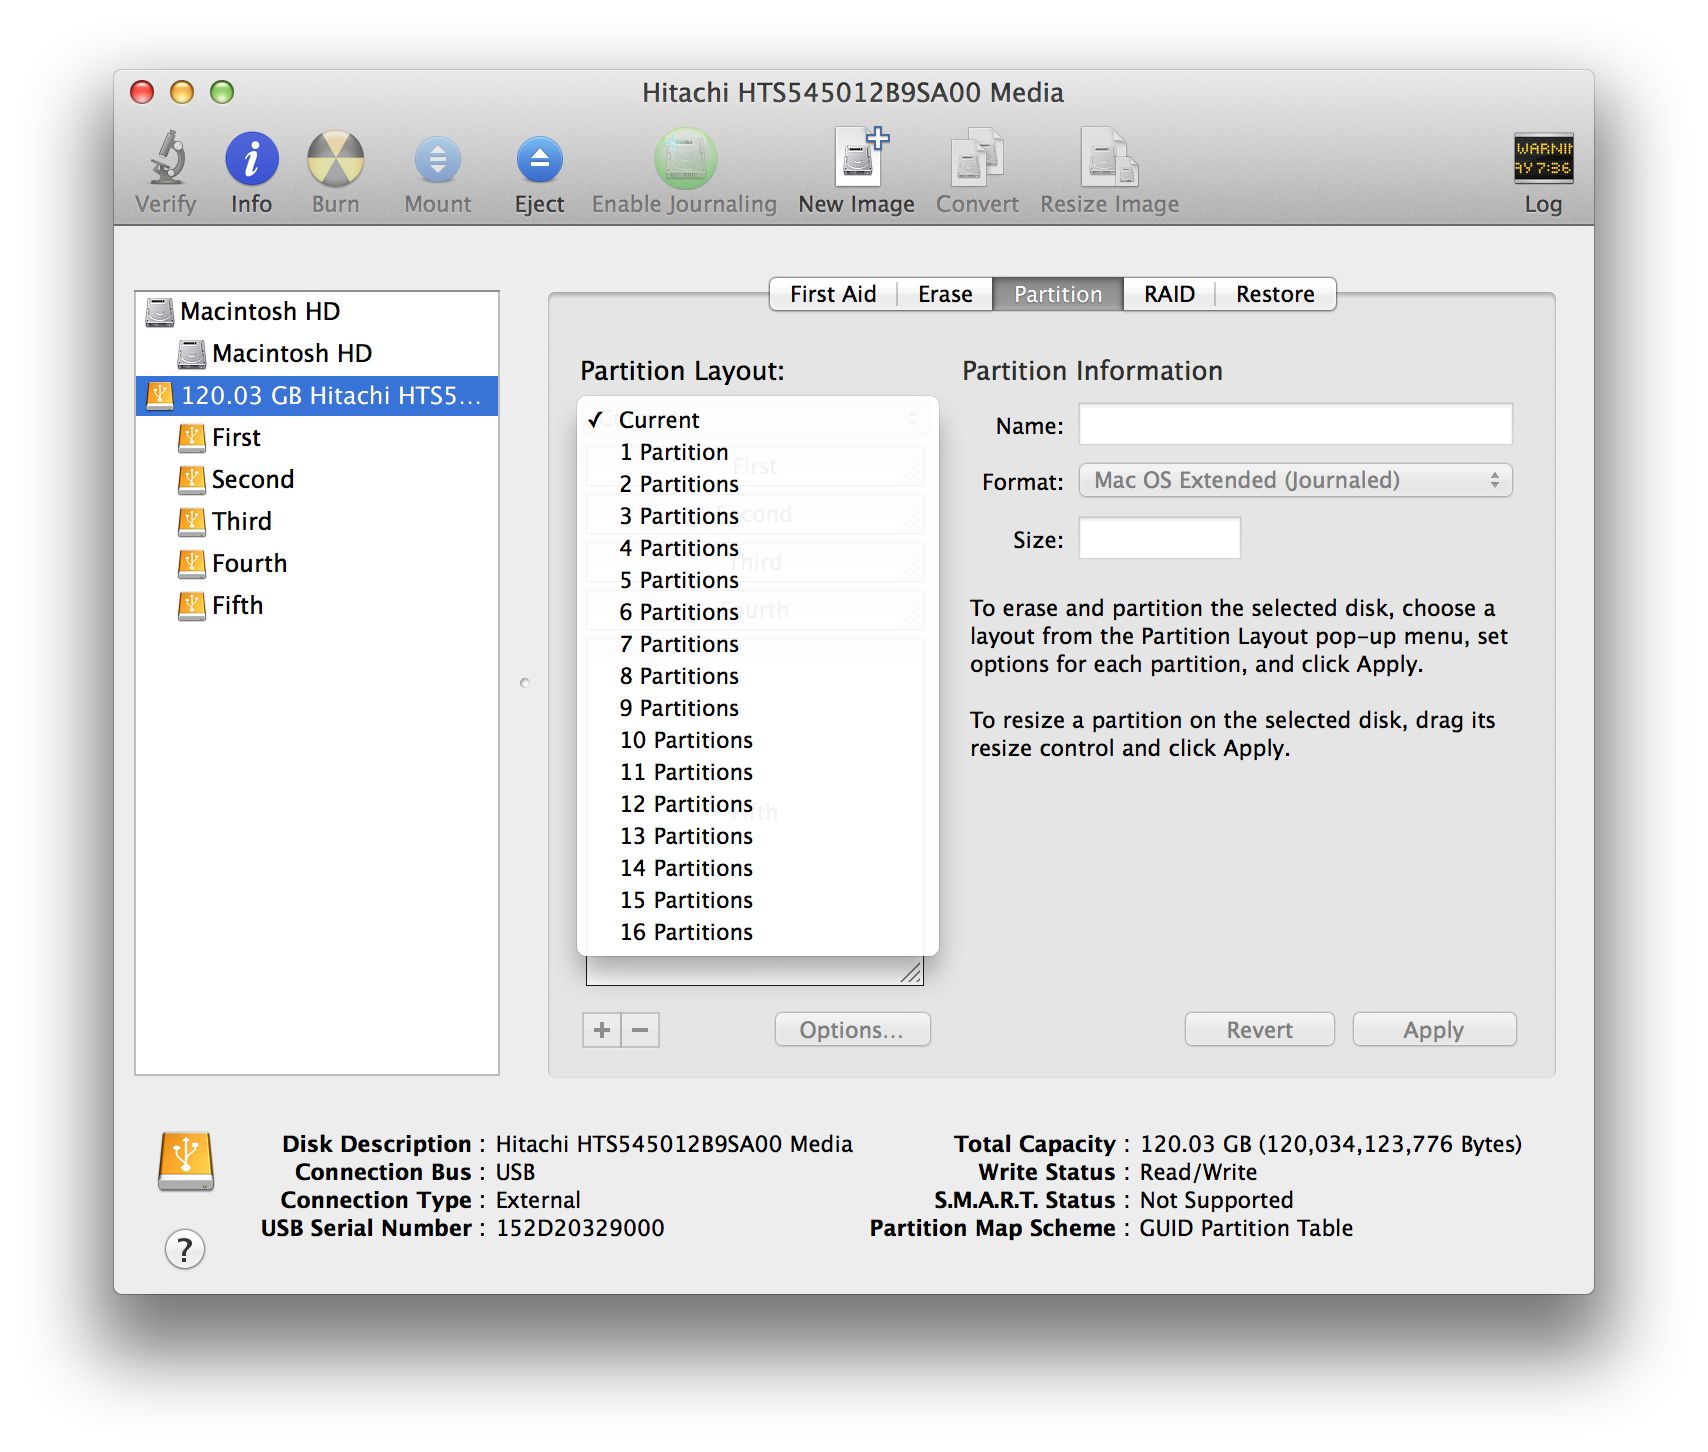
If we tried to perform the same task within Disk Utility, we'd first need to specify the number of partitions from the drop down menu. Then, select each one and name it while making sure we specify the size required.
One limitation of Disk Utility is that the graphical interface can only partition a disk with up to 16 partitions. The command-line, however, has no such limitation and can be used to create as many partitions as required.
Splitting Partitions
Disk partitions can be split into multiple, smaller ones using splitPartition, with a similar command to partitioning a disk.
The option requires the use of a a partition's disk identifier before creating the partitions with the usage convention mentioned earlier:
diskutil splitPartition /dev/disk2s6 JHFS+ Test 10GB JHFS+ Test2 0b
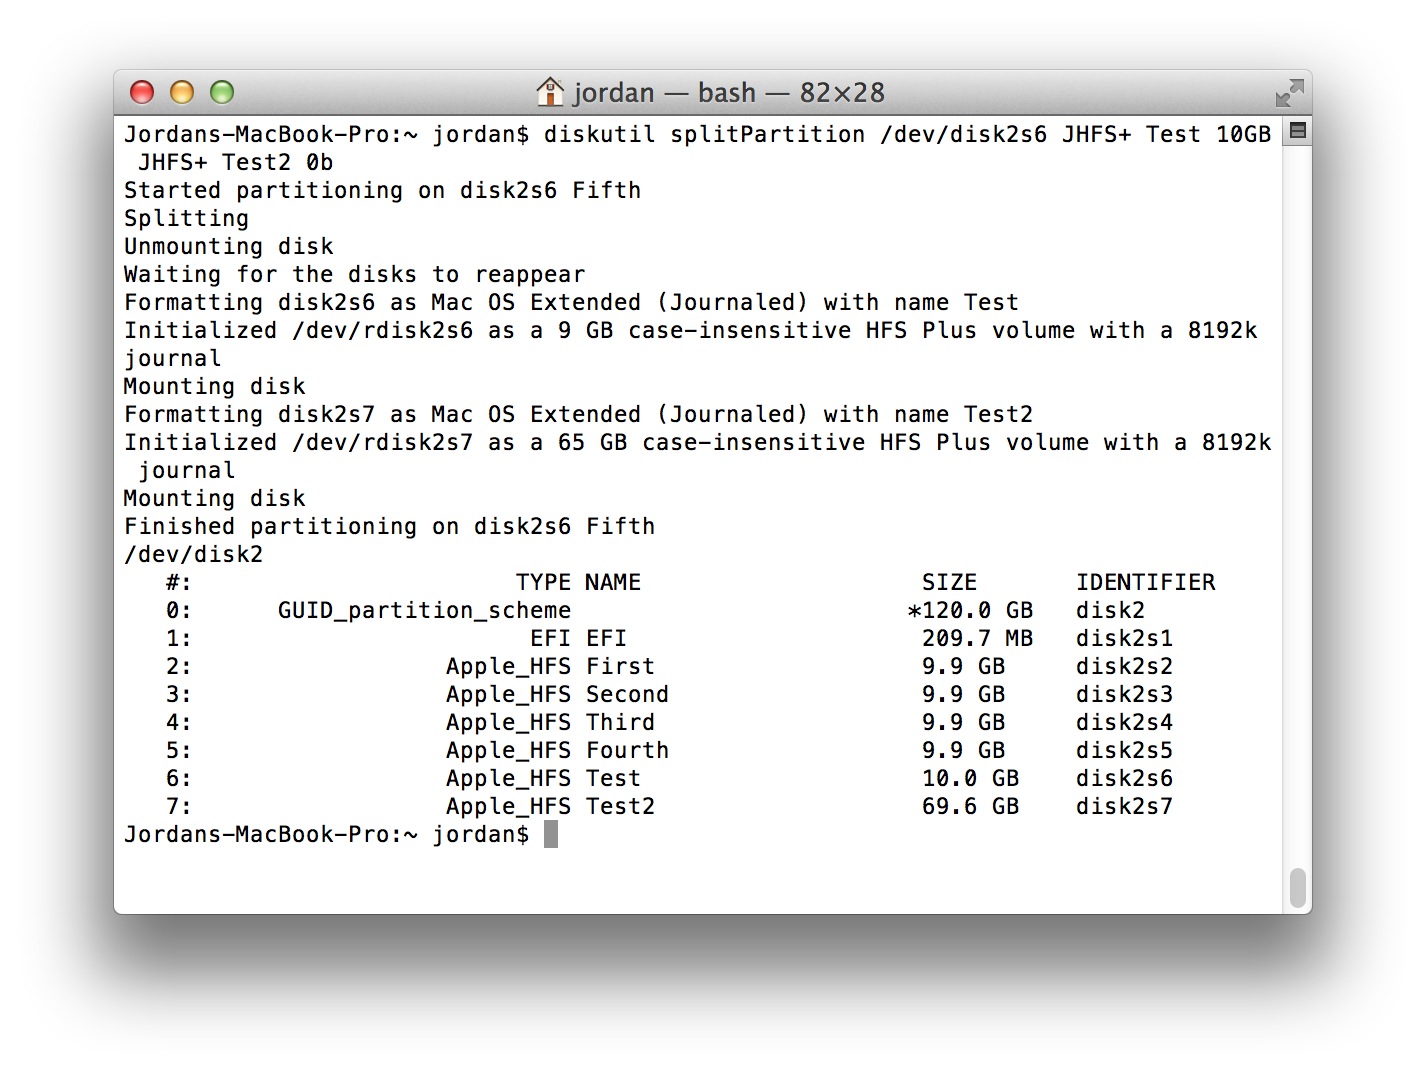
This command will split the partition at /dev/disk2s6 into two smaller ones labeled Test and Test2.
Merging Partitions
To merge two or more partitions together, we can use the mergePartitions option. The partitions you wish to merge must be in sequential order according to each partition's disk identifier.
diskutil mergePartitions JHFS+ NewName {first disk identifier in range} {last disk identifier in range}
For example:
diskutil mergePartitions JHFS+ NewName disk2s4 disk2s6
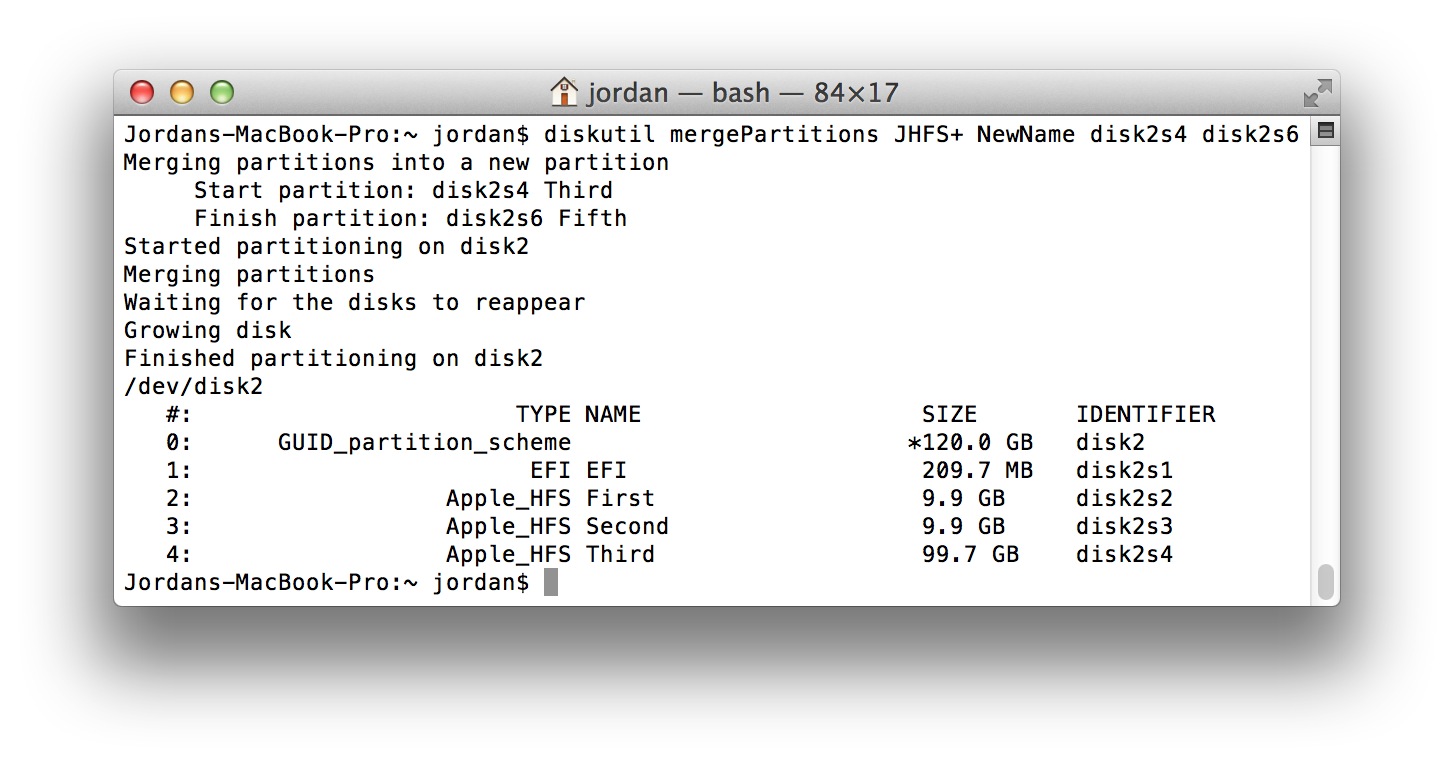
The first disk identifier selects the partition you want to merge the others into, the second specifies the range. Only data on the first disk partition won't be erased, the other partitions will be erased and merged into it.
A filesystem and volume name must still be specified in the event that the first partition you specify cannot expand. In that instance, the command will prompt if you'd rather erase all partitions in the range and create a new one.
Wrapping Up
Managing partitions via the command-line isn't as daunting as you might expect, and it can be much easier to do instead of using Disk Utility.
In the next part of this series, we'll look at creating and restoring disk images to and from volumes.